この記事は3年以上前に書かれた記事で内容が古い可能性があります
とりあえずVagrant/Ansibleを動かしてみたい
必要なものインストール
http://www.vagrantup.com/
上記リンクよりVagrantをインストールしておく。
私の環境は以下。
% vagrant --version
Vagrant 2.0.4
無ければgitもインストールしておく。
% brew install git
無ければvirtualboxもインストールしておく。
http://www.oracle.com/technetwork/server-storage/virtualbox/downloads/index.html?ssSourceSiteId=otnjp
肝心のAnsibleもインストール
% brew install ansible
% brew install http://git.io/sshpass.rb
準備
githubからコードを取ってきて頂いて、
git clone https://github.com/yoshi-island/ansible_work.git
centos7のフォルダを使う。
cd centos7
各ファイルの説明
中身を見ると色々未整備のコードがありますが、それらは追々整備するとして、
今回使うのは、Vagrantfileと、ansible.cfg、hosts、provision_vagrant.yml
Vagrantfileは、Vagrantの設定ファイル。dockerfile的なもの。
どうやってvmを作って、どうやってansibleに渡すかまでを記述する。
今回は、「server」「client」と二台のvmを作成する。作成したら、Ansibleを起動して、hostsに書いてあるホスト(作成するVM)に対して、provision_vagrant.ymlを実行する。
% cat Vagrantfile
VAGRANTFILE_API_VERSION = "2"

Vagrant.configure(VAGRANTFILE_API_VERSION) do |config|

  config.vm.box = "bento/centos-7"
  config.vm.define :server do |server|
    server.vm.hostname = "server"
    server.vm.network :private_network, ip: "192.168.111.223"
  end

  config.vm.define :client do |client|
    client.vm.hostname = "client"
    client.vm.network :private_network, ip: "192.168.111.224"
    client.vm.provision "ansible" do |ansible|
      ansible.playbook = "./provision_vagrant.yml"
      ansible.inventory_path = "./hosts"
      ansible.limit = 'all'
    end
  end

end
ansible.cfgはAnsibleが動くときに最初にみられる設定ファイル。
今回は何も書いていない。
% cat ansible.cfg
[defaults]
hostsはansible実行対象ファイル。作成した二台のサーバについて書いてある。
%  cat hosts
[all]
192.168.111.223
192.168.111.224

[server]
192.168.111.223

[client]
192.168.111.224

[all:vars]
ansible_ssh_pass=vagrant
ansible_sudo_pass=vagrant
provision_vagrant.ymlは実行する内容を書いているファイル
見ての通り、試しに、~/ansible-vagrant-testというファイルを作成したりしている。
% cat provision_vagrant.yml
- hosts: all
  become: yes
  user: root
  gather_facts: false
  tasks:
    - file:
        path: ~/ansible-vagrant-test
        state: touch
        owner: root
        group: root
        mode: 0644

    - name: change system locale
      lineinfile:
        dest: /etc/locale.conf
        regexp: 'LANG=*'
        line: 'LANG=en_US.utf8'
        backup: yes

    - name: ssh command
      debug:
        msg: "sudo ssh vagrant@{{ inventory_hostname }}"
      delegate_to: 127.0.0.1
実行
% vagrant up


........

==> client: Machine booted and ready!
==> client: Checking for guest additions in VM...
==> client: Setting hostname...
==> client: Configuring and enabling network interfaces...
    client: SSH address: 127.0.0.1:2200
    client: SSH username: vagrant
    client: SSH auth method: private key
==> client: Mounting shared folders...
    client: /vagrant => /Users/yoshi/ansible_work/centos7
==> client: Running provisioner: ansible...
Vagrant has automatically selected the compatibility mode '2.0'
according to the Ansible version installed (2.6.1).

Alternatively, the compatibility mode can be specified in your Vagrantfile:
https://www.vagrantup.com/docs/provisioning/ansible_common.html#compatibility_mode

    client: Running ansible-playbook...

PLAY [all] *********************************************************************

TASK [file] ********************************************************************
changed: [192.168.111.223]
changed: [192.168.111.224]

TASK [change system locale] ****************************************************
changed: [192.168.111.223]
changed: [192.168.111.224]

TASK [ssh command] *************************************************************
ok: [192.168.111.224 -> 127.0.0.1] => {
    "msg": "sudo ssh vagrant@192.168.111.224"
}
ok: [192.168.111.223 -> 127.0.0.1] => {
    "msg": "sudo ssh vagrant@192.168.111.223"
}

PLAY RECAP *********************************************************************
192.168.111.223            : ok=3    changed=2    unreachable=0    failed=0
192.168.111.224            : ok=3    changed=2    unreachable=0    failed=0
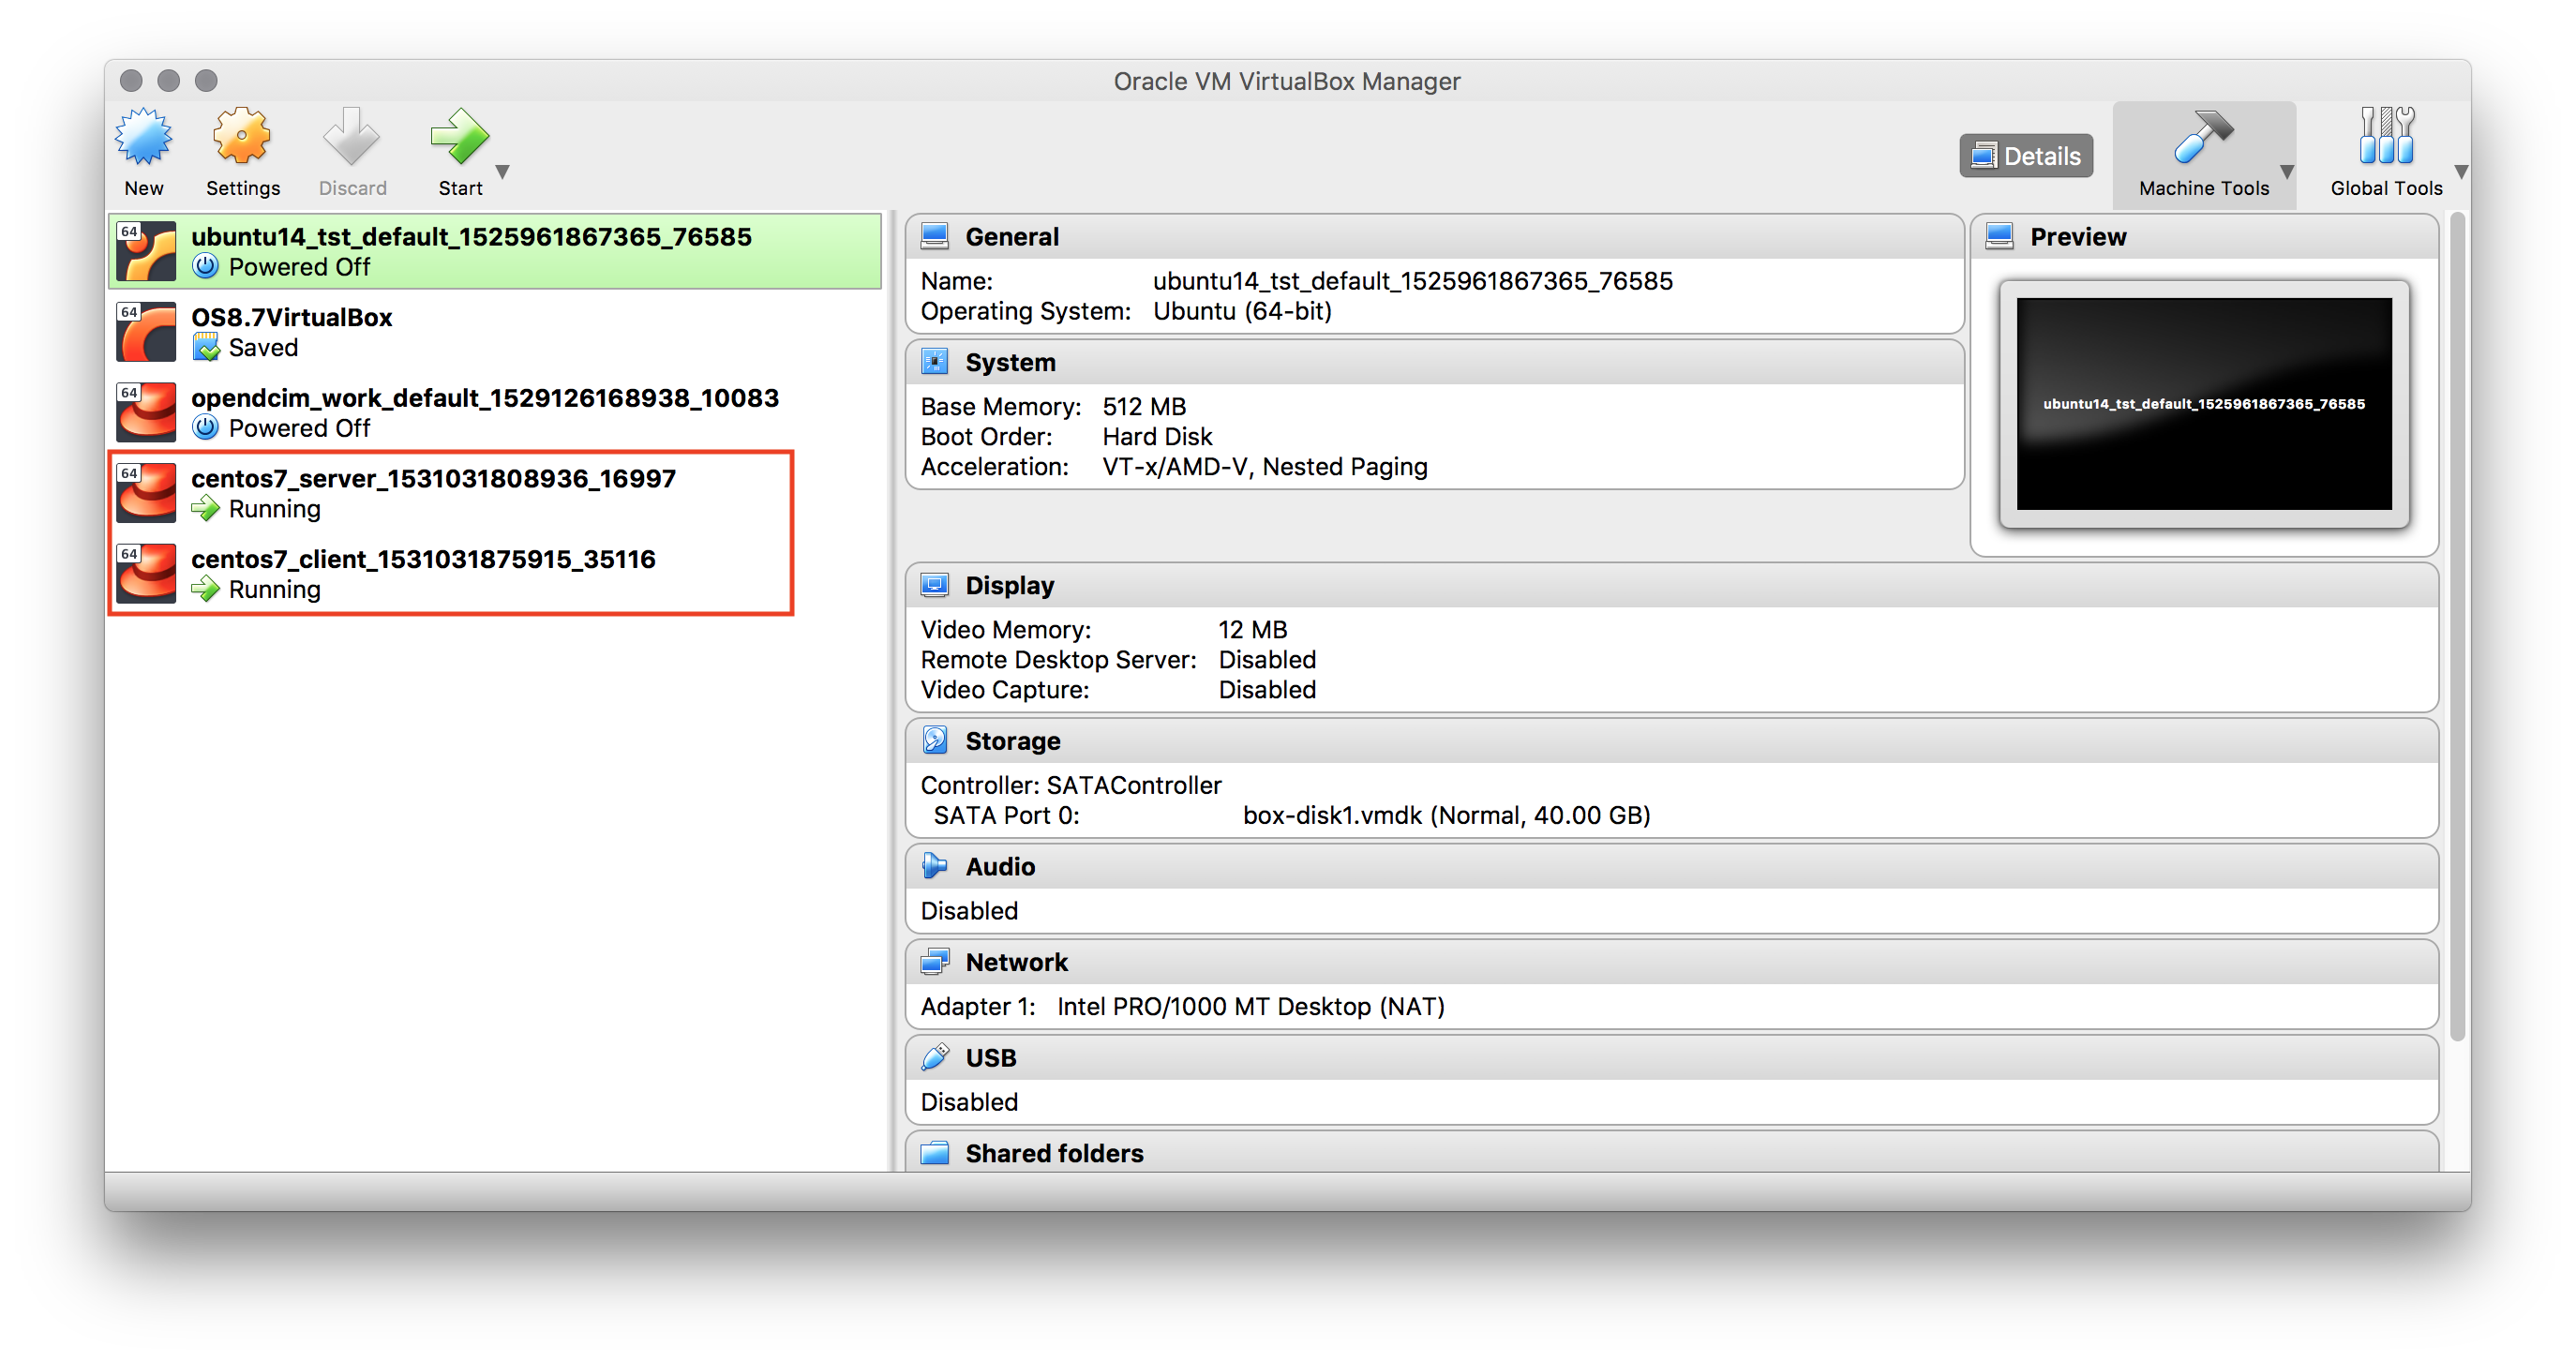
赤枠内が、新たに立ち上がったVM。
VMが出来上がった後に、VMの中身を見ると、テストファイルが作成されているので、Ansibleが無事に動いていることがわかる。
% ssh vagrant@192.168.111.223
vagrant@192.168.111.223's password:
Last login: Sun Jul  8 07:00:07 2018 from 192.168.111.1
[vagrant@server ~]$
[vagrant@server ~]$ sudo su
[root@server vagrant]# ls ~
anaconda-ks.cfg  ansible-vagrant-test  original-ks.cfg
[root@server vagrant]#
% ssh vagrant@192.168.111.223
vagrant@192.168.111.223's password:
Last login: Sun Jul  8 07:06:40 2018 from 192.168.111.1
[vagrant@server ~]$
[vagrant@server ~]$ sudo su
[root@server vagrant]# ls ~
anaconda-ks.cfg  ansible-vagrant-test  original-ks.cfg
[root@server vagrant]#


