この記事は3年以上前に書かれた記事で内容が古い可能性があります
勉強用にOracle Database 12cをCentOS7 on Virtualboxにインストールする
勉強用にOracle Database 12cをCentOS7 on Virtualboxにインストールする
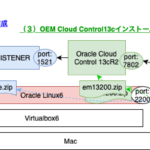
全体図

関連リンク
目次
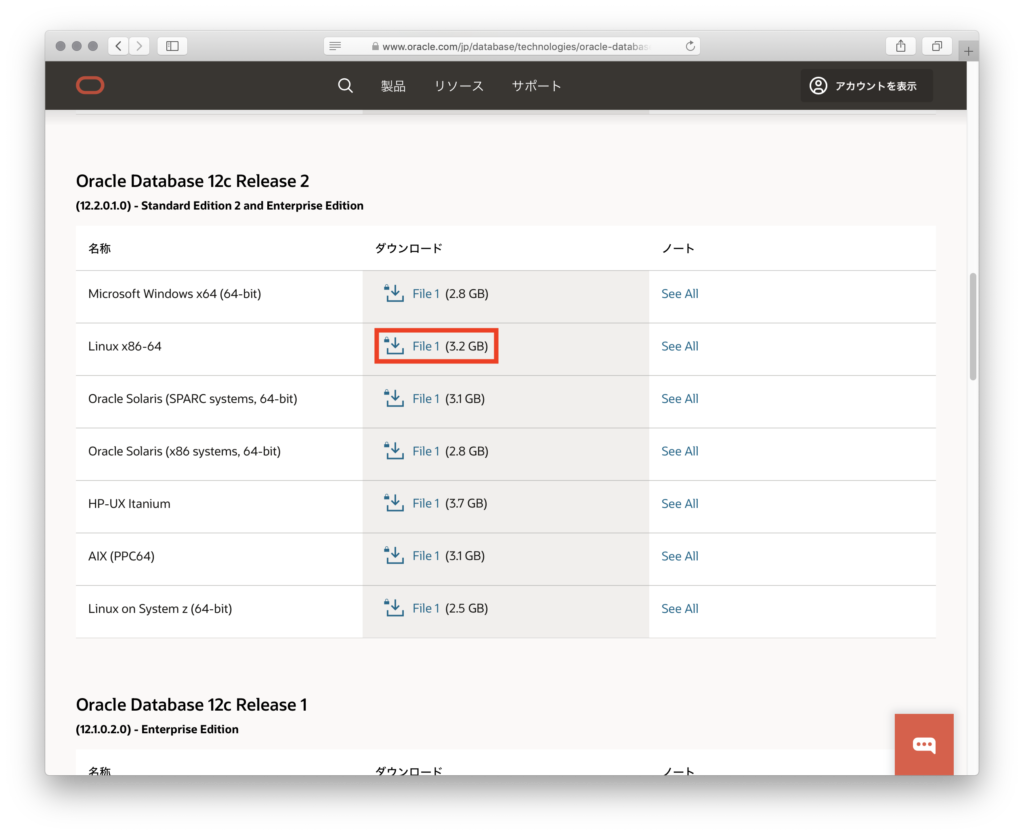
【1】Oracle Database 12cのダウンロード
Oracle Database ソフトウェア・ダウンロード
から「Oracle Database 12c Release 2(Linux x86-64)」をダウンロード
【2】VMの作成
VMの作成については以下のリンクを参照ください
参考:試行錯誤しながら、Vagrant+CentOS7+GUI環境を構築する
※上記リンクのVagrantfileの「vb.memory = “1024”」ではメモリが足りないので、大きくした方が良い(今回は4096MBで設定)
こんな便利なのもあったので、面倒であれば、こちらでやったらもっと手っ取り早いかも
Pre-Built Developer VMs (for Oracle VM VirtualBox)
VirtualboxのGUI操作がもっさりしていたら、こちらの記事を参照ください(CentOS7でも同じ手順です)
参考:Virtualbox上のCentos6のGUIをいい感じに操作するためにVBoxLinuxAdditionsを入れる
【3】事前設定
必要なモジュールをインストール
vimもインストールしておく
# yum -y install vim binutils compat-libcap1 gcc gcc-c++ glibc glibc.i686 glibc-devel glibc.i686 ksh libaio libaio.i686 libaio-devel libaio-devel.i686 libgcc libgcc.i686 libstdc++ libstdc++l7.i686 libstdc++-devel libstdc++-devel.i686 compat-libstdc++-33 compat-libstdc++-33.i686 libXi libXi.i686 libXtst libXtst.i686 make sysstat
...
(略)
...
Complete!
「/etc/sysctl.d/」配下に設定ファイルを作成
ファイル名は適宜変更ください
# vim /etc/sysctl.d/oracle_work.conf
# cat /etc/sysctl.d/oracle_work.conf
kernel.shmall   =   1073741824
kernel.shmmax   =   4398046511104
kernel.shmmni   =   4096
kernel.sem  =   250 32000   100 128
fs.file-max =   6815744
fs.aio-max-nr   =   1048576
net.ipv4.ip_local_port_range    =   9000    65500
net.core.rmem_default   =   262144
net.core.rmem_max   =   4194304
net.core.wmem_default   =   262144
net.core.wmem_max   =   1048576
設定反映
参考:CentOS7の/etc/sysctl.d/以下の設定ファイルの反映方法
# sysctl --system
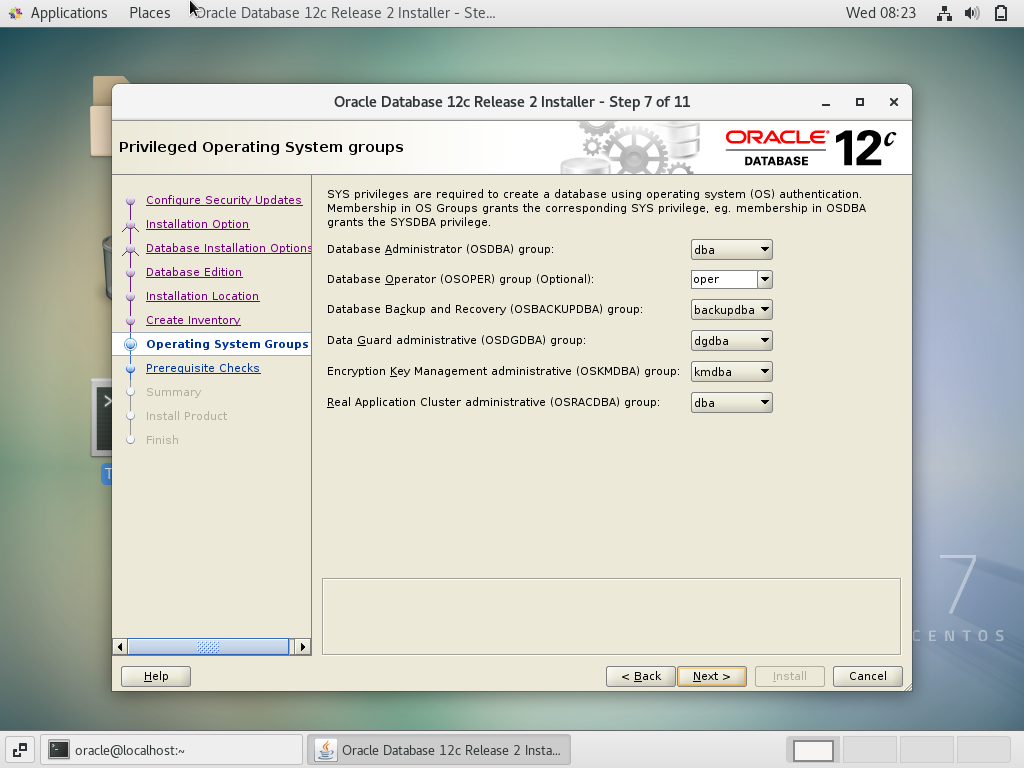
グループ作成
# groupadd -g 54321 oinstall && groupadd -g 54322 dba && \
> groupadd -g 54323 backupdba && groupadd -g 54324 oper && \
> groupadd -g 54325 dgdba && groupadd -g 54326 kmdba
※以下コピペ用
groupadd -g 54321 oinstall && groupadd -g 54322 dba && \
groupadd -g 54323 backupdba && groupadd -g 54324 oper && \
groupadd -g 54325 dgdba && groupadd -g 54326 kmdba
Oracleユーザー作成
# useradd -u 1200 -g oinstall -G dba,oper,backupdba,dgdba,kmdba -d /home/oracle oracle
Oracleユーザーのパスワード設定
# passwd oracle
Changing password for user oracle.
New password:
BAD PASSWORD: The password fails the dictionary check - it is based on a dictionary word
Retype new password:
passwd: all authentication tokens updated successfully.
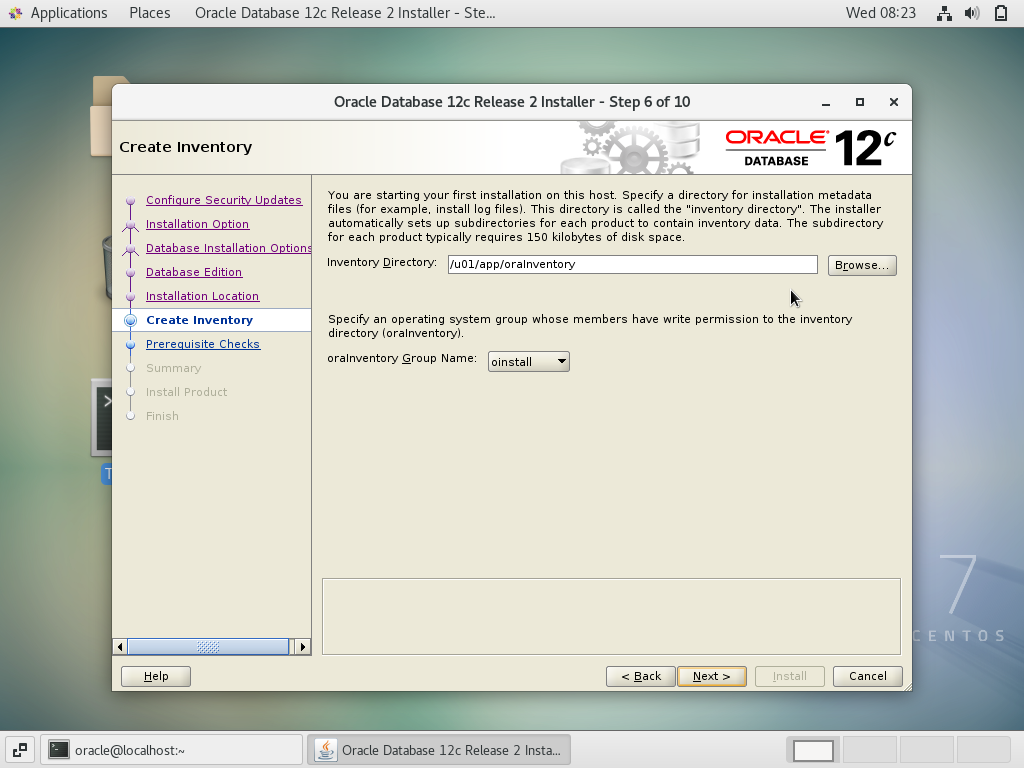
必要なディレクトリ作成
# mkdir -p /u01/app/oracle
# mkdir -p /u01/app/oraInventory
# chown oracle:oinstall /u01/app/oracle
# chown oracle:oinstall /u01/app/oraInventory/
# chmod -R 775 /u01
「/etc/pam.d/login」ファイル15行目に「session required pam_limits.so」を追記
※「/etc/pam.d/login.20200922」はバックアップ用のファイルです
# cp /etc/pam.d/login /etc/pam.d/login.20200922
# vim /etc/pam.d/login
# diff /etc/pam.d/login /etc/pam.d/login.20200922
15d14
< session required pam_limits.so
#
# cat /etc/pam.d/login
#%PAM-1.0
auth [user_unknown=ignore success=ok ignore=ignore default=bad] pam_securetty.so
auth       substack     system-auth
auth       include      postlogin
account    required     pam_nologin.so
account    include      system-auth
password   include      system-auth
# pam_selinux.so close should be the first session rule
session    required     pam_selinux.so close
session    required     pam_loginuid.so
session    optional     pam_console.so
# pam_selinux.so open should only be followed by sessions to be executed in the user context
session    required     pam_selinux.so open
session    required     pam_namespace.so
session required pam_limits.so
session    optional     pam_keyinit.so force revoke
session    include      system-auth
session    include      postlogin
-session   optional     pam_ck_connector.so
「/etc/security/limits.conf」ファイル末尾に、いろいろ追記
※「/etc/security/limits.conf.20200922」はバックアップ用のファイルです
# cp /etc/security/limits.conf /etc/security/limits.conf.20200922
# vim /etc/security/limits.conf
# diff /etc/security/limits.conf /etc/security/limits.conf.20200922
62,68d61
<
< oracle soft nproc 2047
< oracle hard nproc 16384
< oracle soft nofile 1024
< oracle hard nofile 65536
< oracle soft stack 10240
< oracle hard stack 32768
#
# tail -8 /etc/security/limits.conf
# End of file

oracle soft nproc 2047
oracle hard nproc 16384
oracle soft nofile 1024
oracle hard nofile 65536
oracle soft stack 10240
oracle hard stack 32768
【4】Oracle12cインストールと初期設定
作業用ディレクトリを作成する(今回は「oracle_work」にしました)
# su - oracle
$ mkdir oracle_work
$ cd oracle_work
scpとかで、ダウンロードしたoracle databaseファイルを固めて作業用ディレクトリに置いておく
参考:「vagrant ssh」の経路を使って「scp」したいのだが
送ったファイルを解凍
$ ls
database.zip
$ unzip database.zip
oracleユーザーでGUIログイン
参考:「Perhaps you do not have console ownership?」エラーでstartxできない
解凍したディレクトリ配下の「runInstaller」を実行
$ sh oracle_work/database/runInstaller
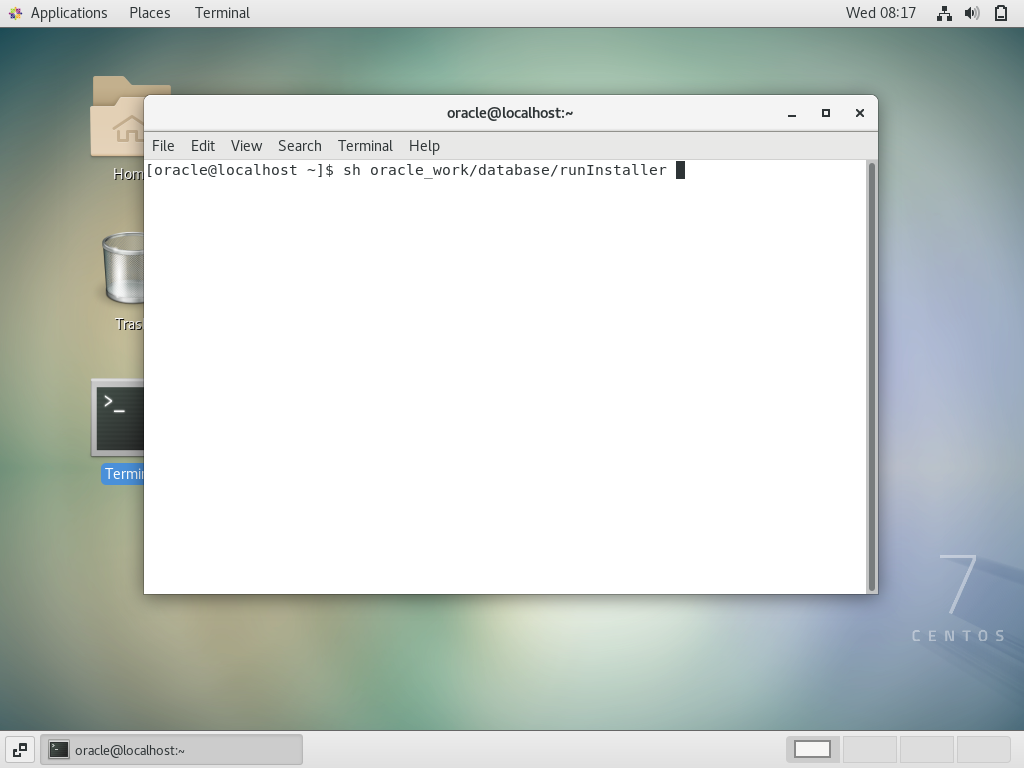
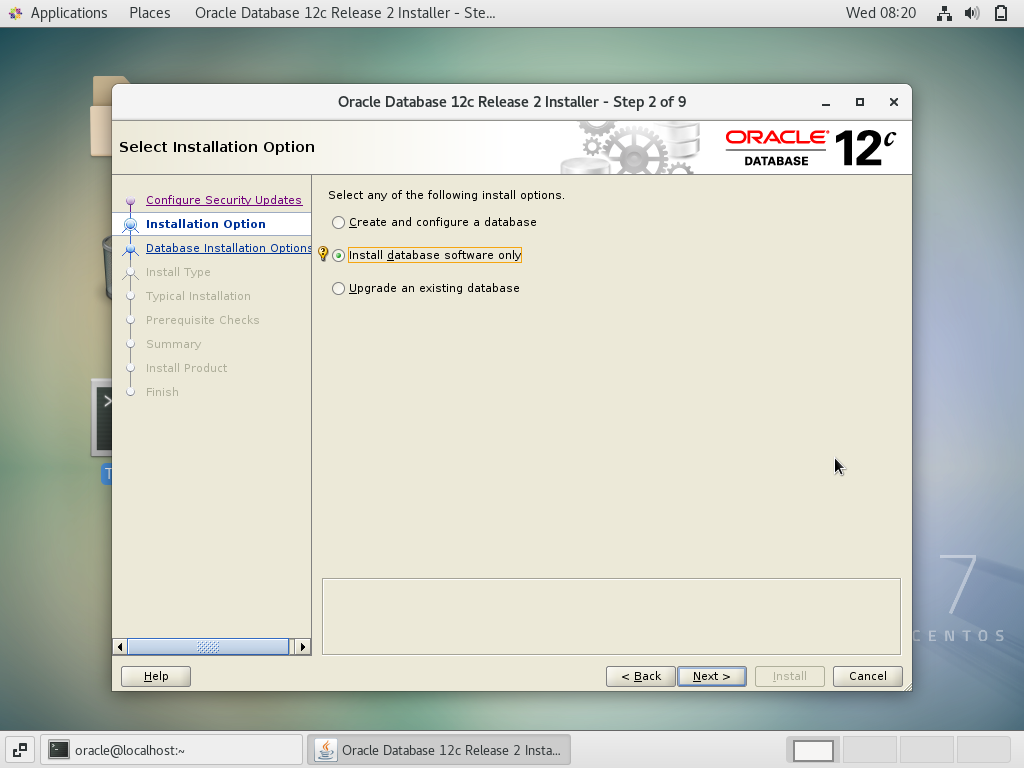
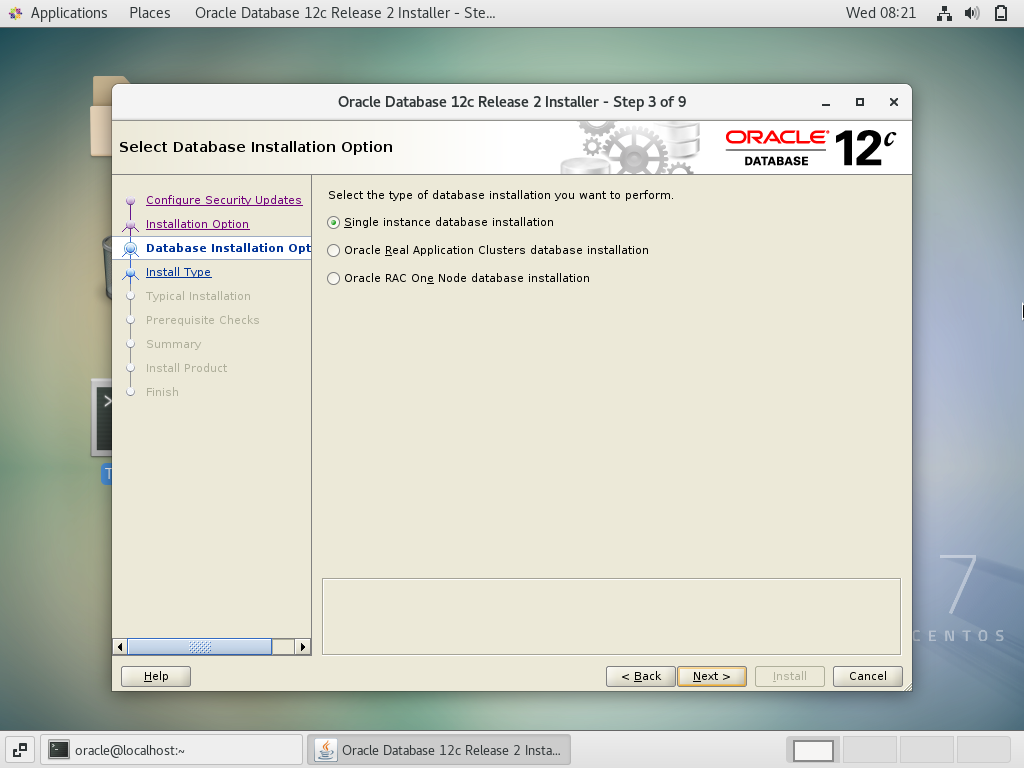
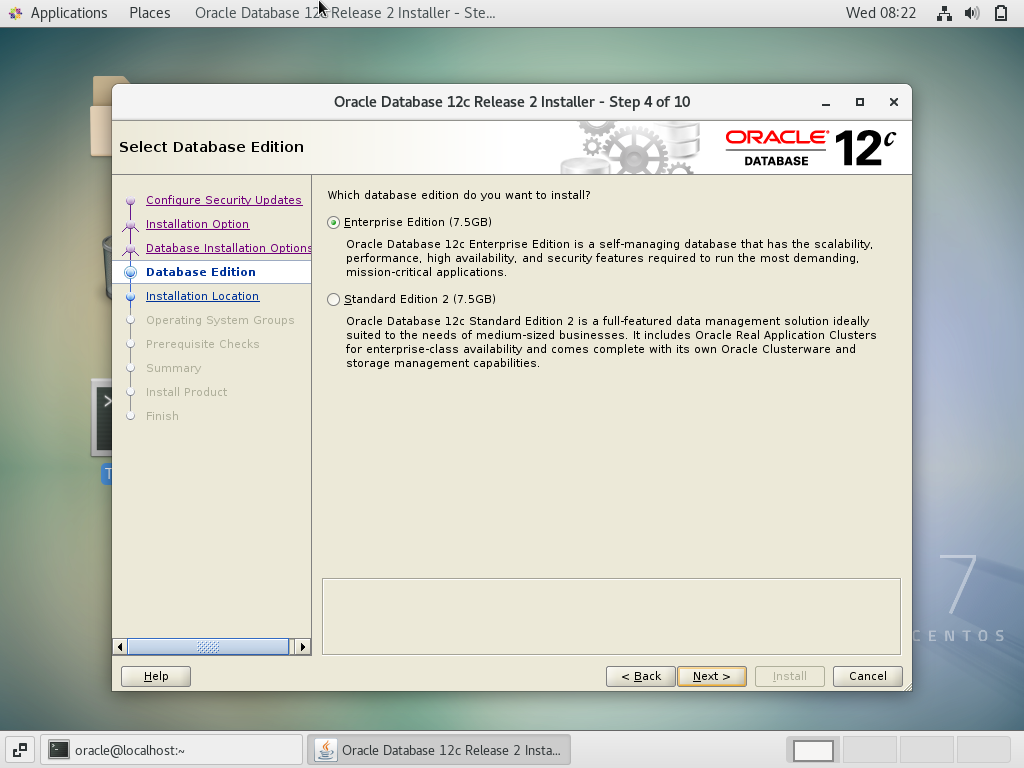
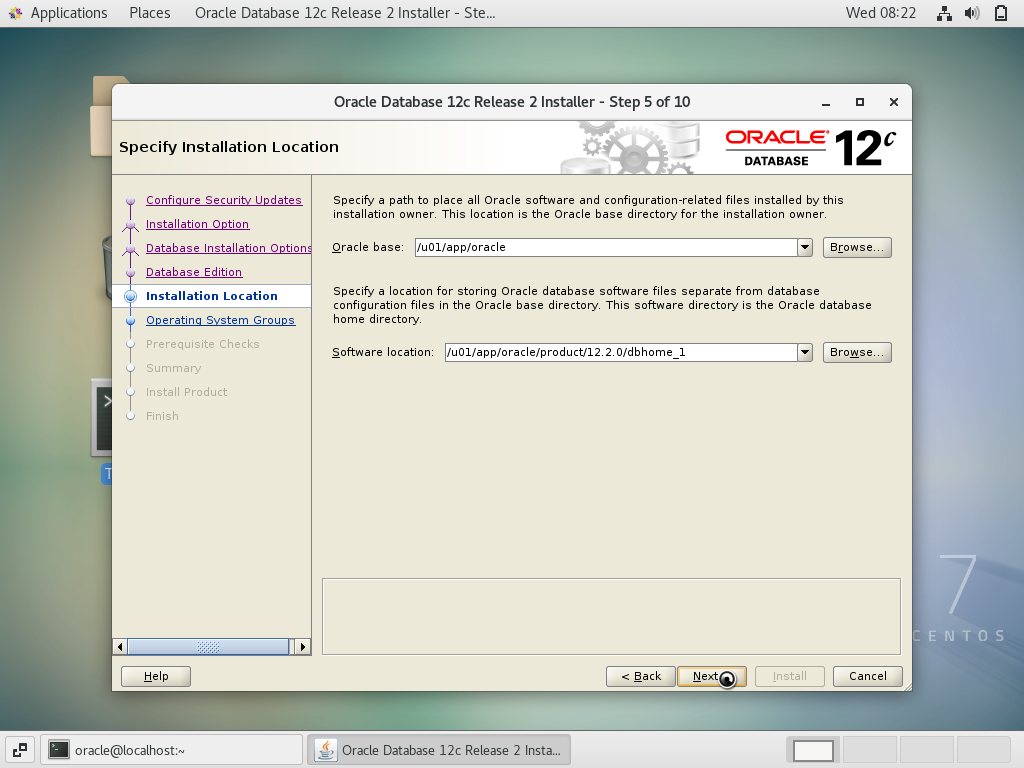
Oracleの設定画面が立ち上がるので、案内に沿って進めていく
メールアドレスは記入しないと警告画面が出るが無視して続行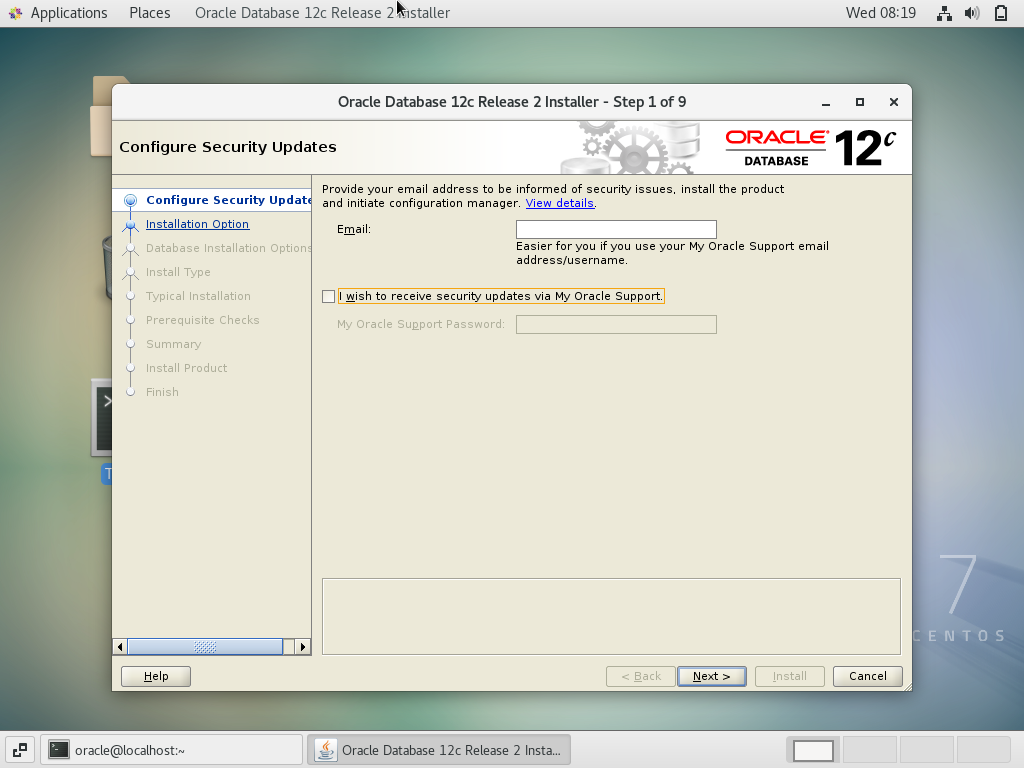
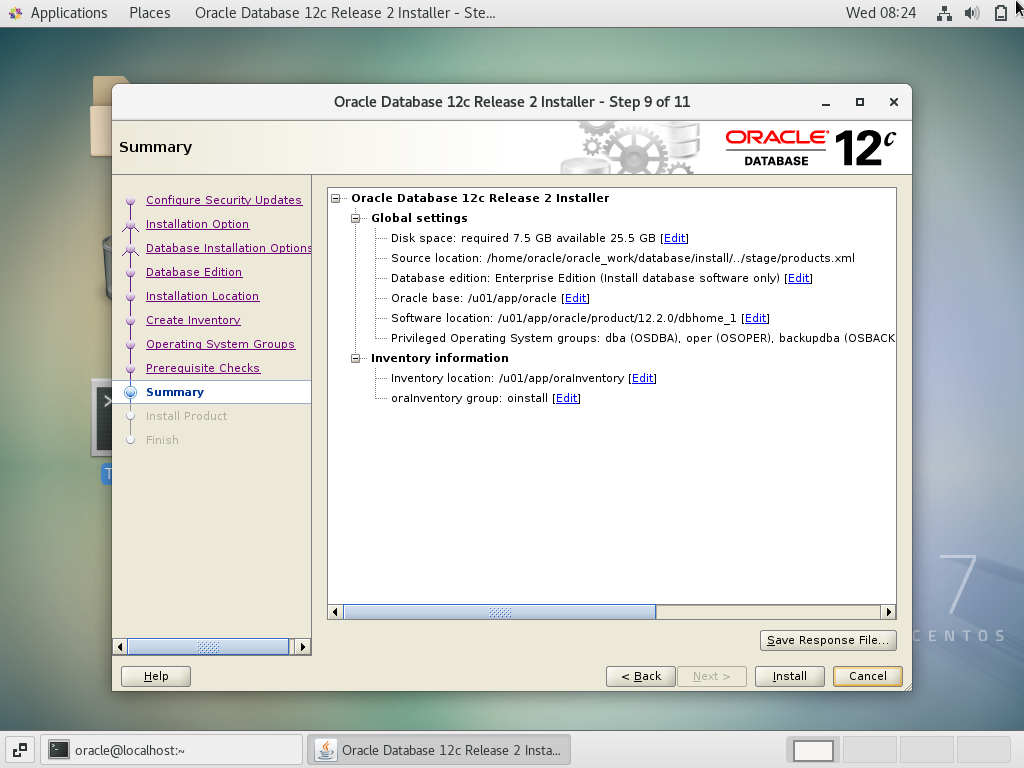
インストールの途中で、「二つのスクリプトをrootユーザーで実行せよ」と出てくるので、言われた通りに実行する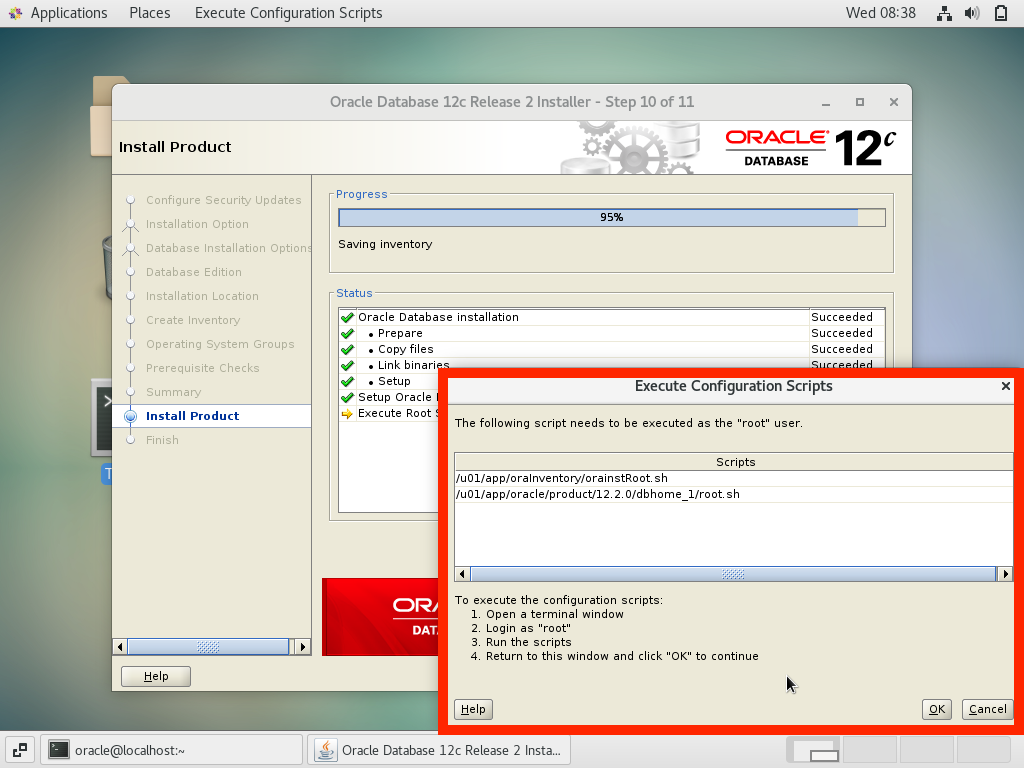
一つ目のスクリプト
# sh /u01/app/oraInventory/orainstRoot.sh
Changing permissions of /u01/app/oraInventory.
Adding read,write permissions for group.
Removing read,write,execute permissions for world.

Changing groupname of /u01/app/oraInventory to oinstall.
The execution of the script is complete.
二つ目は、いくつか質問されるのでとりあえずデフォルト(Enterキー)で進む
# sh /u01/app/oracle/product/12.2.0/dbhome_1/root.sh
Performing root user operation.

The following environment variables are set as:
    ORACLE_OWNER= oracle
    ORACLE_HOME=  /u01/app/oracle/product/12.2.0/dbhome_1

Enter the full pathname of the local bin directory: [/usr/local/bin]:
   Copying dbhome to /usr/local/bin ...
   Copying oraenv to /usr/local/bin ...
   Copying coraenv to /usr/local/bin ...


Creating /etc/oratab file...
Entries will be added to the /etc/oratab file as needed by
Database Configuration Assistant when a database is created
Finished running generic part of root script.
Now product-specific root actions will be performed.
Do you want to setup Oracle Trace File Analyzer (TFA) now ? yes|[no] :

Oracle Trace File Analyzer (TFA - User Mode) is available at :
    /u01/app/oracle/product/12.2.0/dbhome_1/suptools/tfa/release/tfa_home/bin/tfactl

OR

Oracle Trace File Analyzer (TFA - Daemon Mode) can be installed by running this script :
    /u01/app/oracle/product/12.2.0/dbhome_1/suptools/tfa/release/tfa_home/install/roottfa.sh
実行が終わったら、設定ウィンドウのOKボタンを押す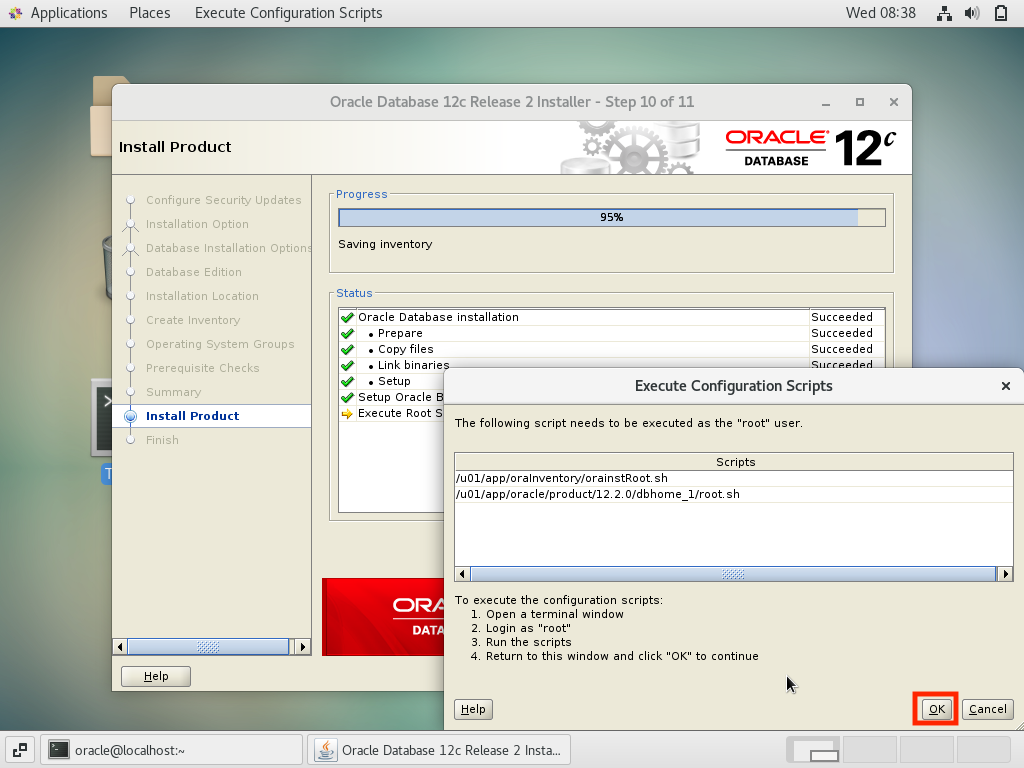
晴れてインストール完了!
【5】事後設定
今後ためにoracleユーザーをsudoersに加えておく
# usermod -G wheel oracle
「.bash_profile」の末尾にに環境変数(ORACLE_HOME)を追加しておく
$ vim ~/.bash_profile
$ tail -5 ~/.bash_profile


# 20200923追記
export ORACLE_HOME=/u01/app/oracle/product/12.2.0/dbhome_1
export PATH=$PATH:$ORACLE_HOME/bin
設定反映
$ source ~/.bash_profile
参考:CentOS7にOracle12cをインストールして使う方法+トラブルシューティング