この記事は3年以上前に書かれた記事で内容が古い可能性があります
Oracle EM Cloud Controlに監視対象のホストを登録する
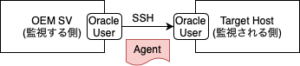
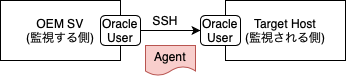
Cloud Controlにホストを登録するには、Agentのインストールが必要
色々方法があると思うが、今回は、Cloud Control側の操作で、ターゲットホストにAgentをインストールして監視対象にする
参考:Overview of Installing Management Agents Using Add Host Targets Wizard or EM CLI
※Cloud Controlの作成手順はこちら
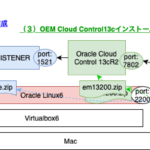
参考:OEM Cloud Control13cをOracleLinux6 on Virtualboxにインストールする〜(1)VM作成〜
全体図
目次
インストール先ディレクトリ作成
TargetホストでAgentのインストール先ディレクトリを作成
$ mkdir -p /u01/app/oracle/agent
SSH鍵交換
※EMサーバで操作
参考:[Vagrant][Mac]vagrant ssh-configを使い、Cyberduck(SFTP) / SSHでVagrantへ接続する
鍵作成
$ ssh-keygen -t rsa
Generating public/private rsa key pair.
Enter file in which to save the key (/home/oracle/.ssh/id_rsa):
Enter passphrase (empty for no passphrase):
Enter same passphrase again:
Your identification has been saved in /home/oracle/.ssh/id_rsa.
Your public key has been saved in /home/oracle/.ssh/id_rsa.pub.
The key fingerprint is:
a1:99:99:99:a9:9a:99:aa:a9:a9:a9:aa:99:a9:99:99 oracle@oemsv.localdomain
The key's randomart image is:
+--[ RSA 2048]----+
|        .. +. .. |
|       oo =o .o  |
|       .ooo..+.  |
|         .E..o.  |
|         ...     |
|         .o      |
|        S.....o  |
|          .o o   |
|         .. .    |
+-----------------+
公開鍵確認
$ cat /home/oracle/.ssh/id_rsa.pub
ssh-rsa AAAAhogehogehogehogehogehogehogehogehogehogehogehogeho/hogehogehogehogehogehogehogehogehogehogehogehogehogehogehogehogehogehogehogehogehogehogehogehogehogehogehogehogehogehogehogehogehogehogehogehoge/hogehogehogehogehogehogehogehogehogehogehogehogehogehogehogehogehogehogehogehogehogehogehogehogehogehogehogehogehogehogehogehogehogehogehogehogehogehogehogehogehogehoge== oracle@oemsv.localdomain
※ターゲットホストで操作
確認した公開鍵を「authorized_keys」というファイルを作成して貼り付ける
$ mkdir /home/oracle/.ssh
$ vim /home/oracle/.ssh/authorized_keys
$ cat /home/oracle/.ssh/authorized_keys
ssh-rsa AAAAhogehogehogehogehogehogehogehogehogehogehogehogeho/hogehogehogehogehogehogehogehogehogehogehogehogehogehogehogehogehogehogehogehogehogehogehogehogehogehogehogehogehogehogehogehogehogehogehogehoge/hogehogehogehogehogehogehogehogehogehogehogehogehogehogehogehogehogehogehogehogehogehogehogehogehogehogehogehogehogehogehogehogehogehogehogehogehogehogehogehogehogehoge== oracle@oemsv.localdomain
※EMサーバで操作
EMサーバからターゲットホストへ、ノンパスでSSHできることを確認
$ ssh 192.168.33.102
Last login: Tue Oct 27 21:00:35 2020
$
「oracle.sysman.prov.agentpush.enablePty」パラメータ設定
※EMサーバで操作
cpでバックアップを作成してから、「oracle.sysman.prov.agentpush.enablePty」のパラメータをTrueに設定
# cp /u01/app/oracle/middleware/sysman/prov/agentpush/agentpush.properties /u01/app/oracle/middleware/sysman/prov/agentpush/agentpush.properties.20201029
# vim /u01/app/oracle/middleware/sysman/prov/agentpush/agentpush.properties
# diff /u01/app/oracle/middleware/sysman/prov/agentpush/agentpush.properties /u01/app/oracle/middleware/sysman/prov/agentpush/agentpush.properties.20201029
134c134
< oracle.sysman.prov.agentpush.enablePty=true
---
> oracle.sysman.prov.agentpush.enablePty=false
これを設定しないと、ホスト登録の際に以下のようなエラーが出る
You can either set the “oracle.sysman.prov.agentpush.enablePty” property to true in the “/u01/app/oracle/middleware/sysman/prov/agentpush/agentpush.properties” file, which is present on the OMS host, pass -S argument to the sudo command, or enable the “visiblepw” flag in the sudoers file.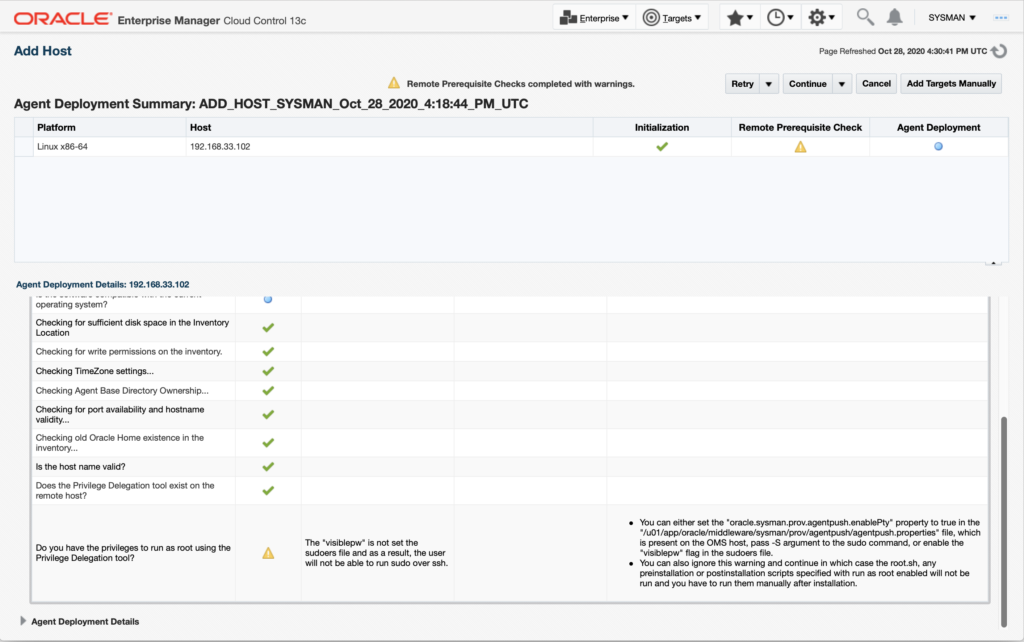
参考:6.2.2.3 ホスト・ターゲットの追加ウィザードまたはEM CLIを使用してスタンドアロン管理エージェントをインストールするための汎用前提条件を満たす
「oracle」ユーザーの権限設定
※ターゲットホストで操作
Oracleユーザーにsudo権限を与える
自動でAgentをインストールするのに必要、難しければ、手動でAgentを入れることになる
# id oracle
uid=1200(oracle) gid=54321(oinstall) groups=54321(oinstall),54322(dba),54323(backupdba),54324(oper),54325(dgdba),54326(kmdba)
# usermod -u 1200 -g oinstall -G dba,oper,backupdba,dgdba,kmdba,wheel -d /home/oracle oracle
# id oracle
uid=1200(oracle) gid=54321(oinstall) groups=54321(oinstall),10(wheel),54322(dba),54323(backupdba),54324(oper),54325(dgdba),54326(kmdba)
これを設定しないとホスト登録の際に以下のエラーが発生
Ensure user “oracle” has privileges to run commands as user “root” using the Privilege Delegation tool “/usr/bin/sudo”.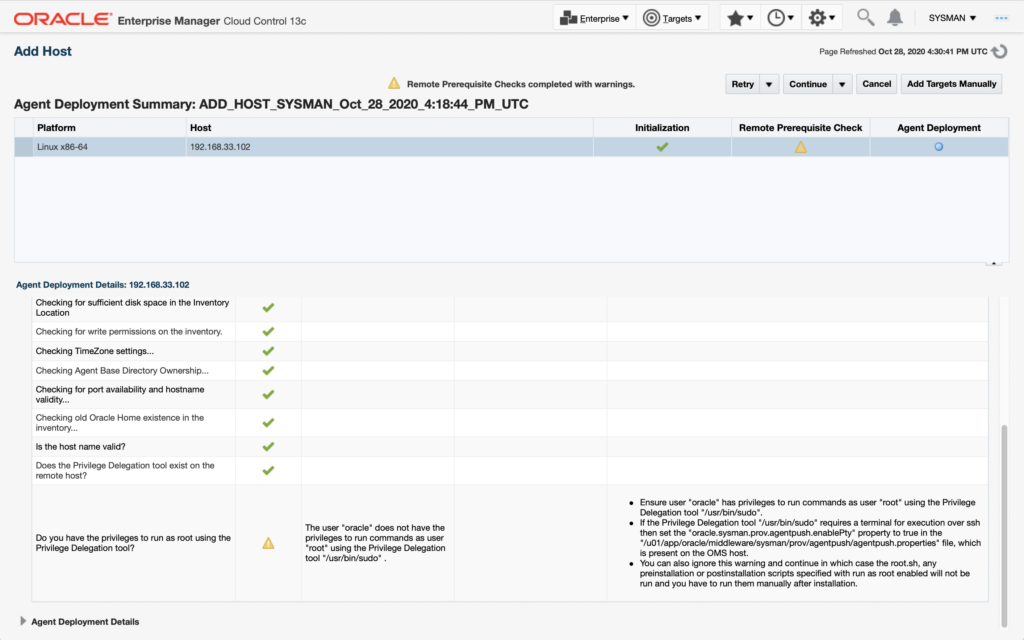
Hostsの設定
※ターゲットホストで操作
ターゲットホストのHostsファイルに、OEMサーバの情報を登録する
設定
# cp /etc/hosts /etc/hosts.20201106
# vim /etc/hosts
# diff /etc/hosts /etc/hosts.20201106
5,6d4
<
< 192.168.33.101    oemsv.localdomain    oemsv
確認
# ping -c 3 oemsv.localdomain
PING oemsv.localdomain (192.168.33.101) 56(84) bytes of data.
64 bytes from oemsv.localdomain (192.168.33.101): icmp_seq=1 ttl=64 time=0.461 ms
64 bytes from oemsv.localdomain (192.168.33.101): icmp_seq=2 ttl=64 time=0.566 ms
64 bytes from oemsv.localdomain (192.168.33.101): icmp_seq=3 ttl=64 time=0.763 ms

--- oemsv.localdomain ping statistics ---
3 packets transmitted, 3 received, 0% packet loss, time 2076ms
rtt min/avg/max/mdev = 0.461/0.596/0.763/0.128 ms
これを設定しないとホスト登録の際に以下のエラーが発生する
Error Message: The Oracle Management Server (OMS) host and port specified via OMS_HOST and EM_UPLOAD_PORT is not available. Pass in a valid hostname and port number for the OMS to successfully deploy the agent.
Error Message:/bin/sh: /u01/app/oracle/agent/agent_13.2.0.0.0/bin/zip: No such file or directory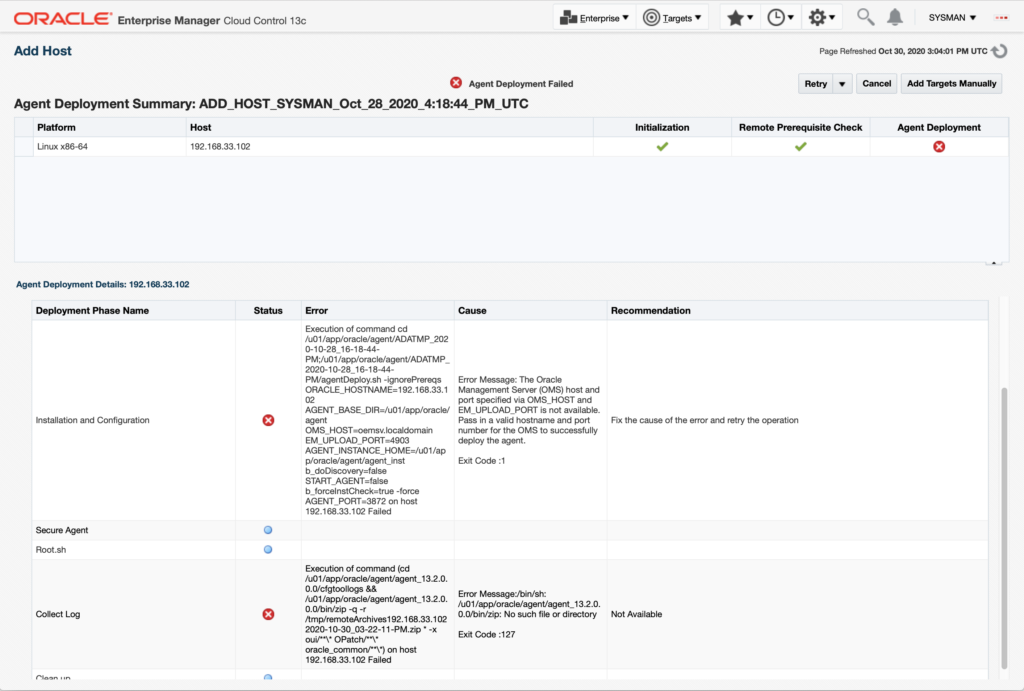
ホスト登録
※EMサーバ(GUI)で操作
「歯車マーク」>「Add Target」>「Add Targets Manually」をクリック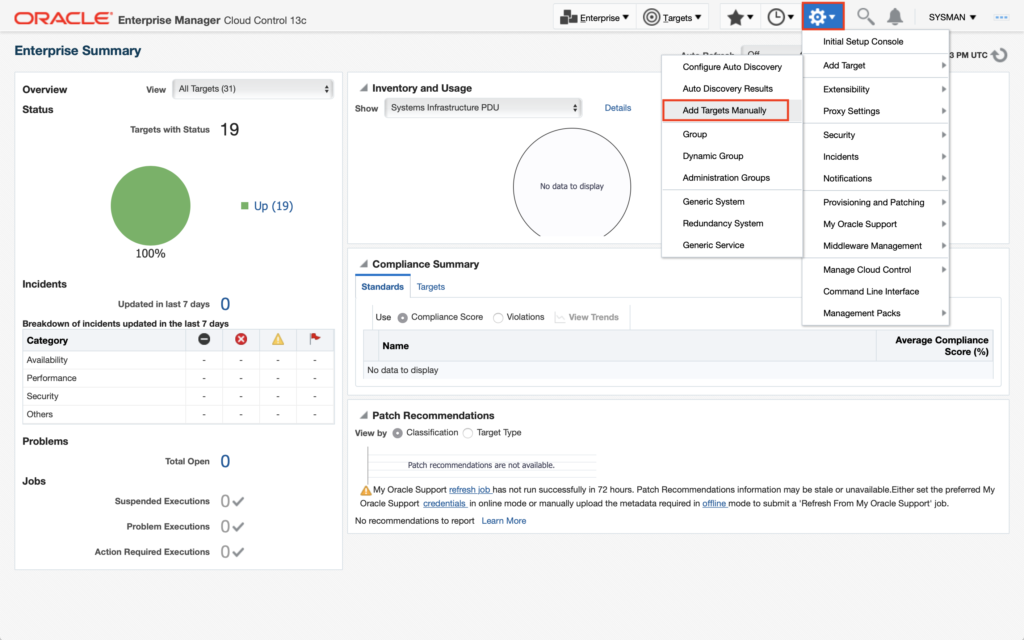
「Install Agent on Host」をクリック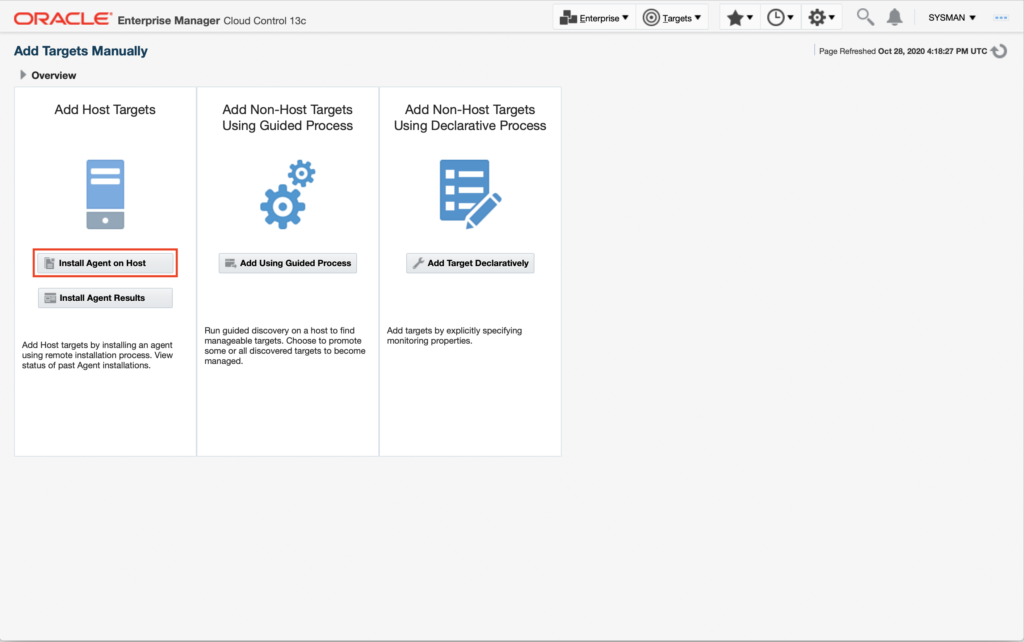
監視対象ホスト名またはIPアドレスを入力し、Platformを選択
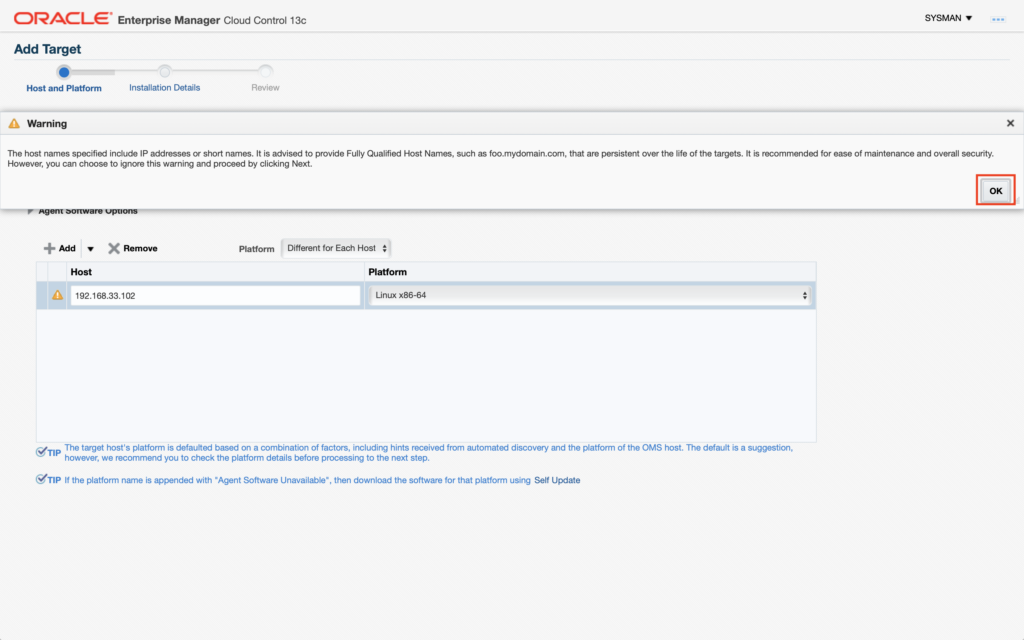
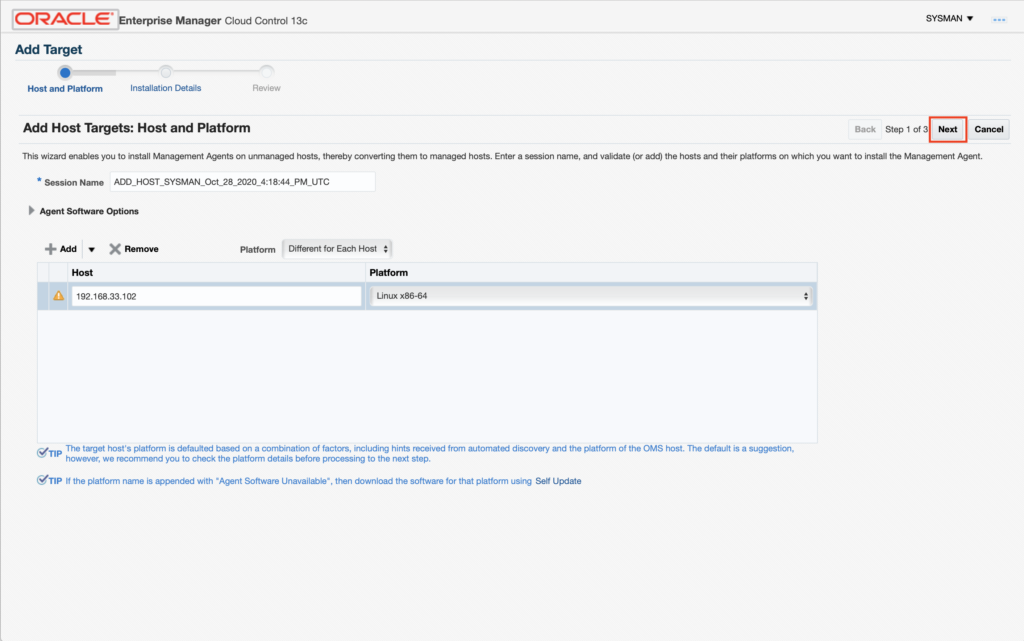
「Next」を押すとIPアドレスの場合は、Warningが出るが、閉じた後、再度「Next」を押すと先に進める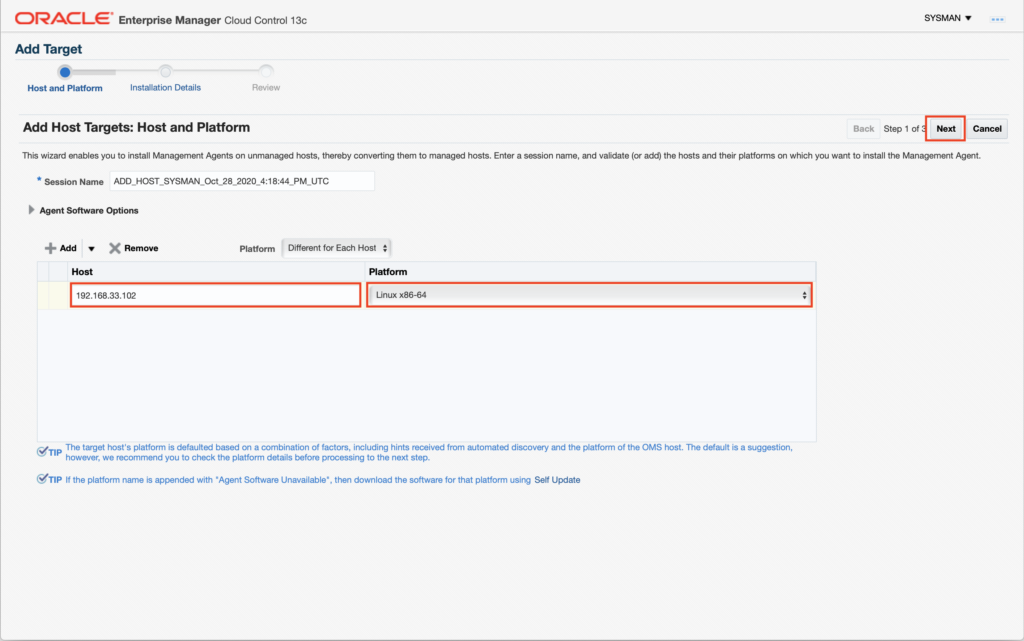
作成したインストール先ディレクトリのパスを「Installation Base Directory」に入力すると、「Instance Directory」も自動的に入力される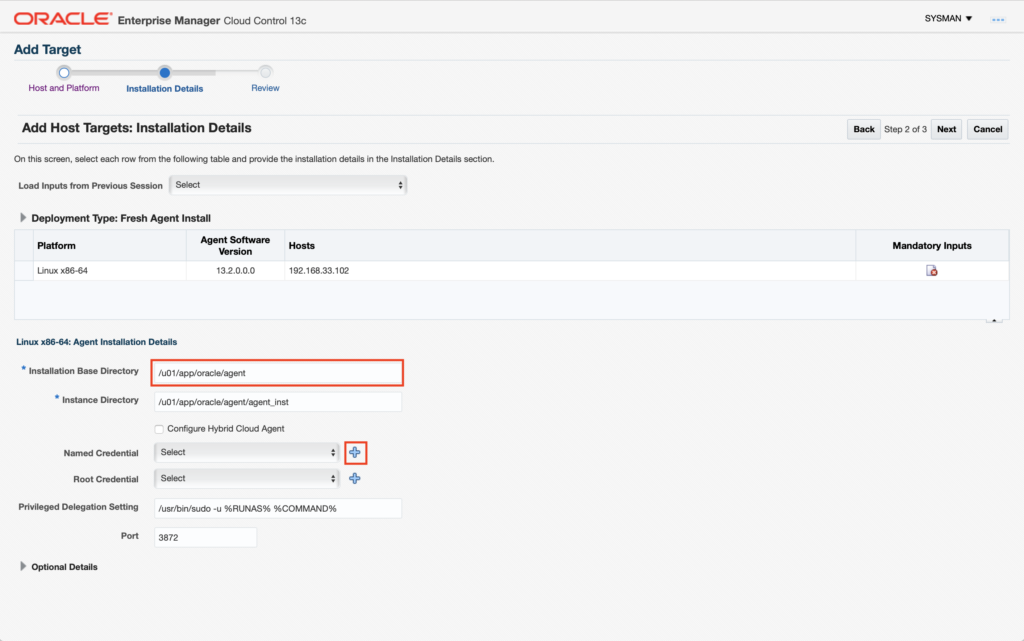
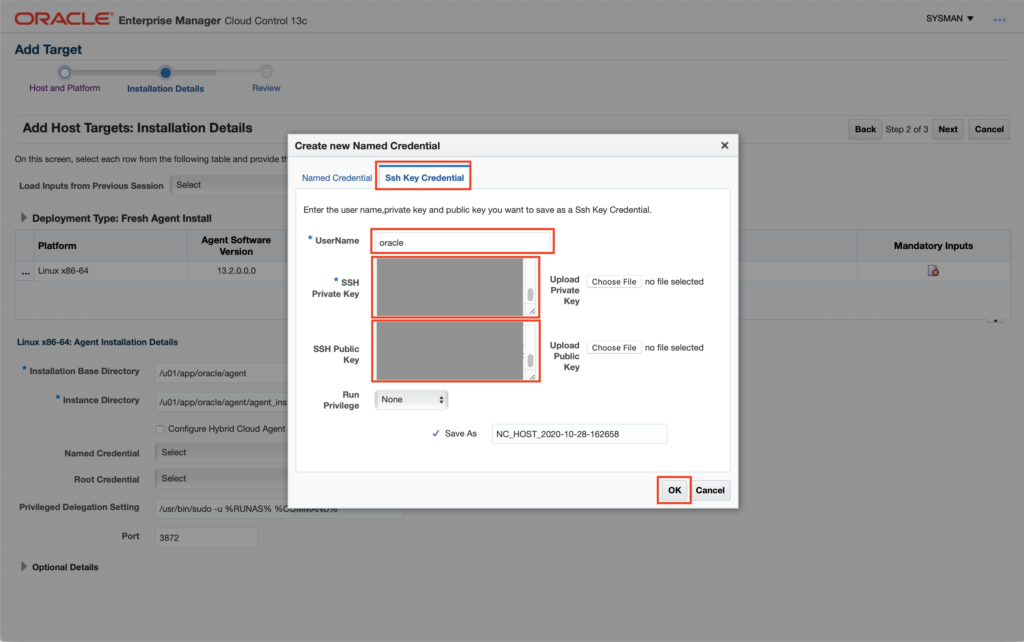
「Named Credential」の右のプラスマークを押し、ターゲットホストにアクセスする際の認証情報を入力する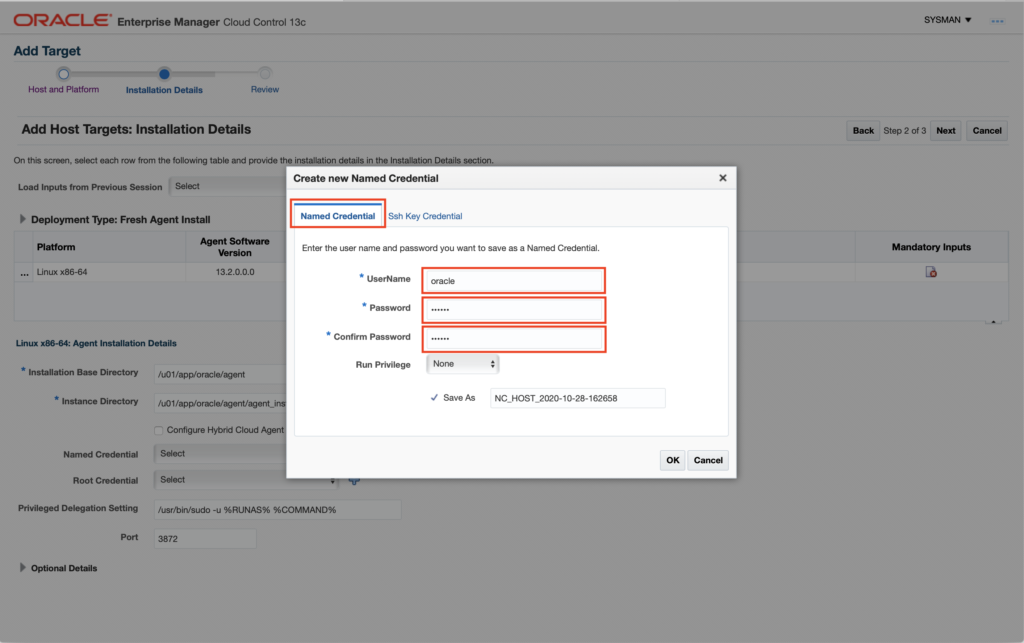
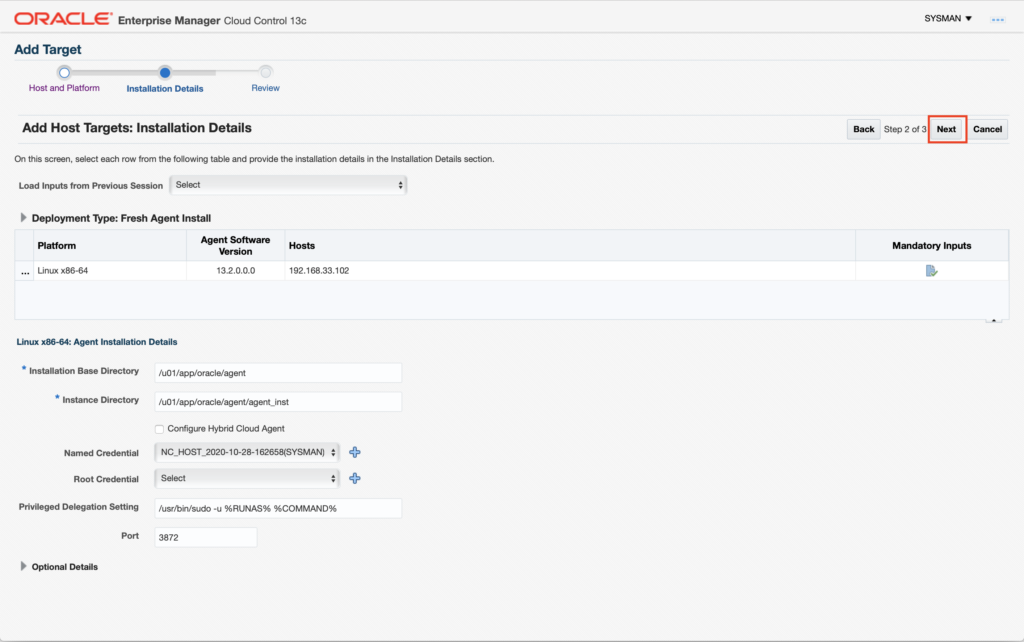
「Deploy Agent」をクリック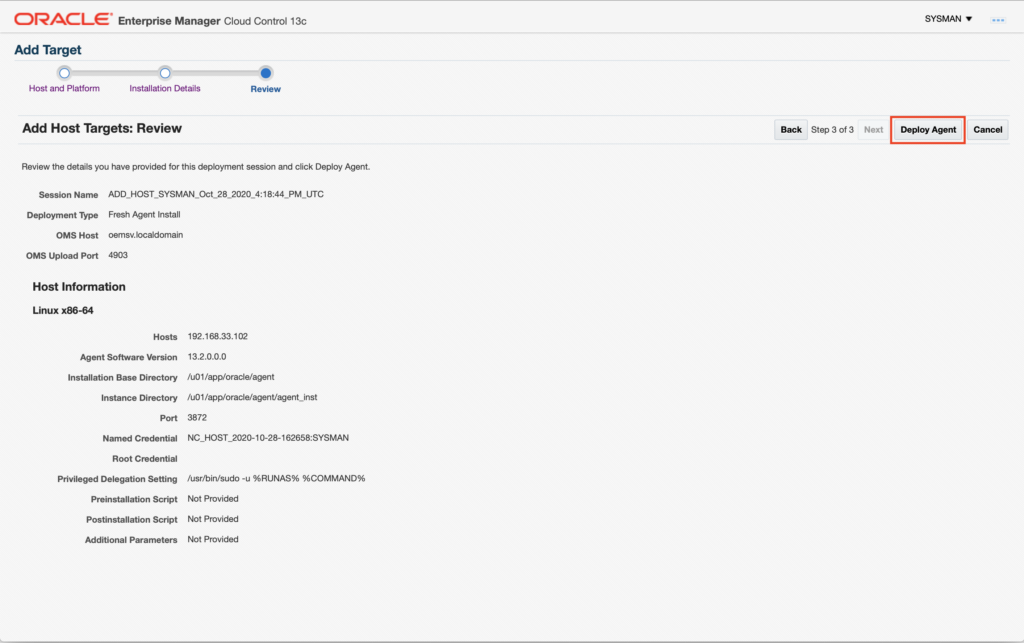
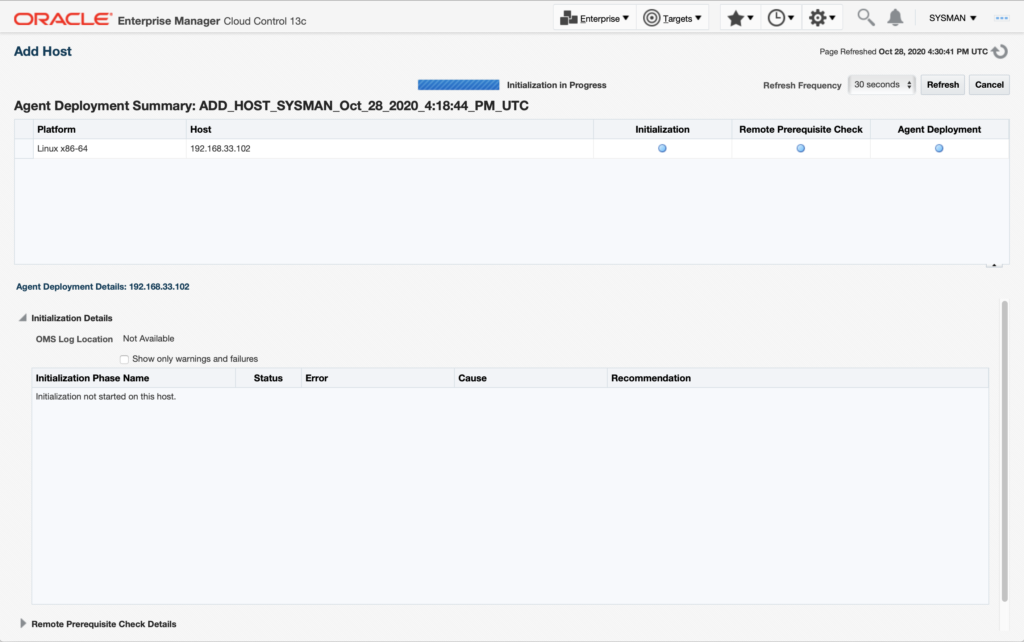
しばらくしたら完了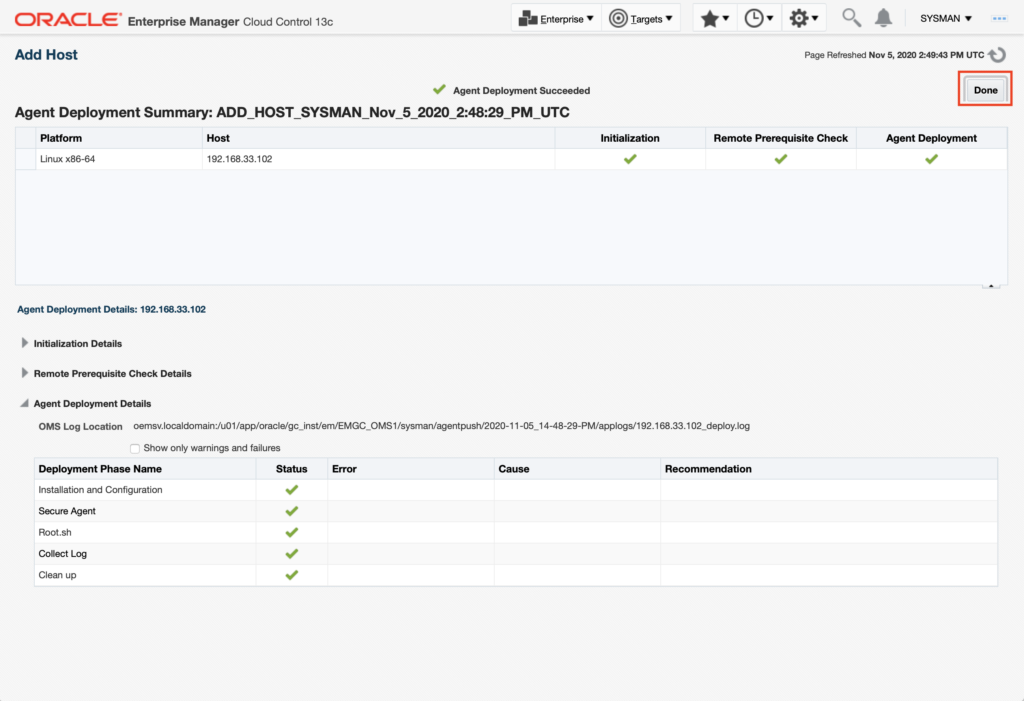
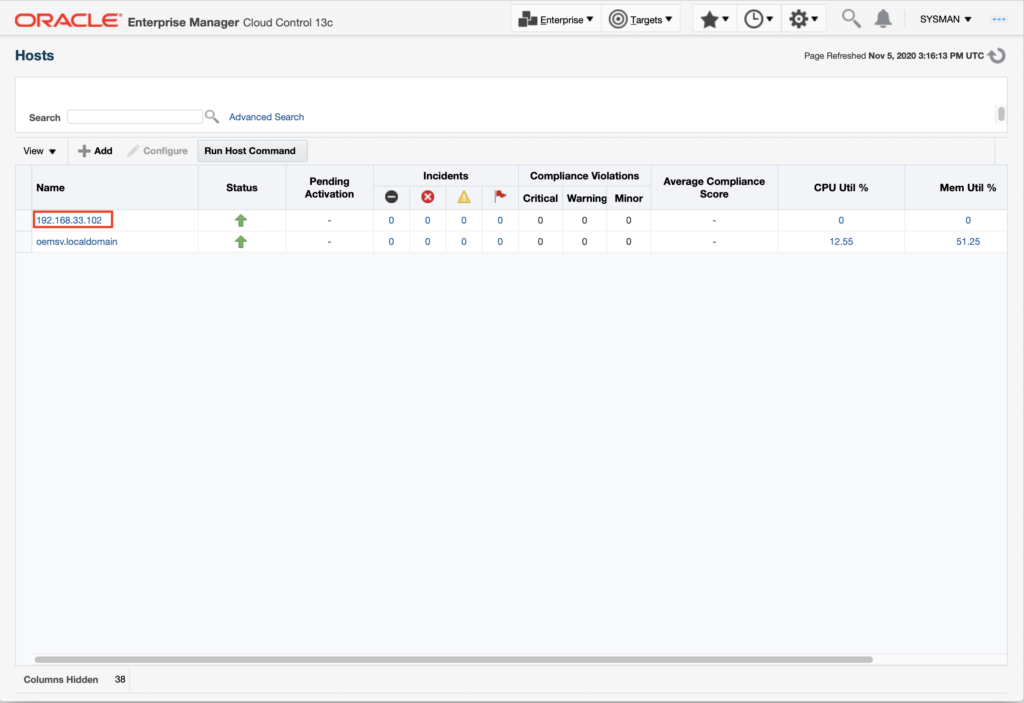
「Targets」>「Hosts」から登録したホストが確認できる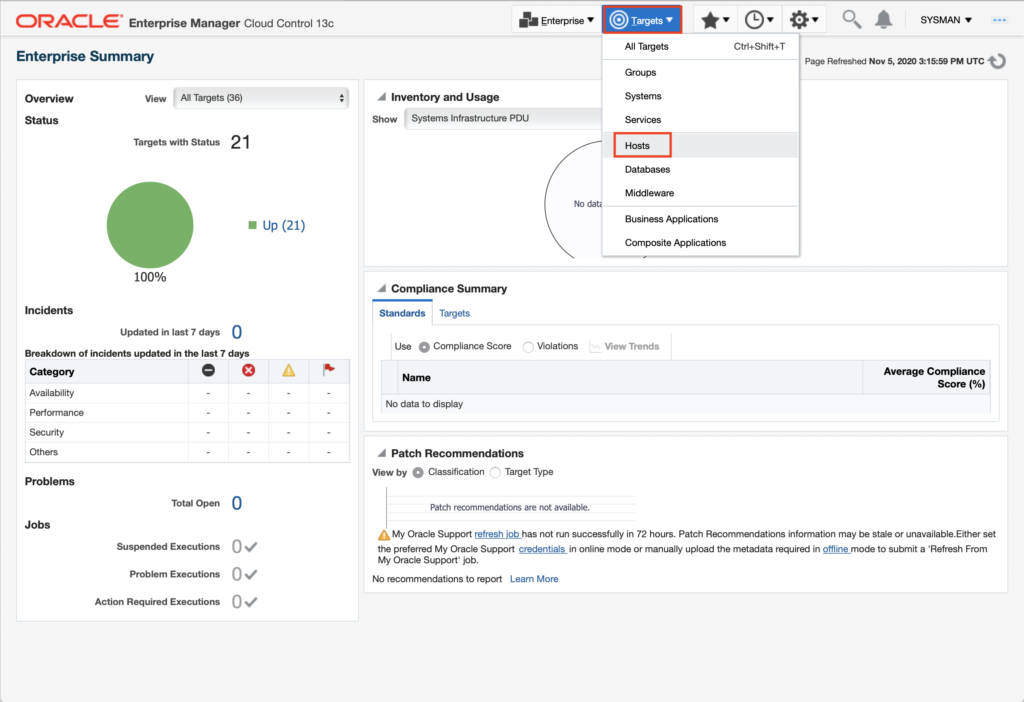
以上。